
I recently put a new collage of pictures up on the wall, and I decided to spiff the frames up a bit. For my gray one, I used some washi tape. For my teal one; however, I wanted to add some texture, so I decided on a fabric flower.
I love these flowers, and they are so easy to make! You just need some fabric strips, scissors, a glue gun, and a scrap of felt, and you’re all set! Start by cutting a circle out of the felt; this will determine how big your flower will be. You can make it however small or large you desire. I used a juice cup to trace a circle since I can’t freehand a perfect circle.


Next, cut or tear your fabric into some strips. I’ve done both methods, but I prefer to cut mine with my rotary cutter. I measured mine out to be 1.25” wide (this will shrink down to half that width in a minute). The length does not matter for this project.

Plug the glue gun in, and while it warms, fold and unfold your fabric in half to make a slight crease (top to bottom). Once the glue gun is ready to go, glue along the wrong side of the fabric along the top (a little bit at a time) and fold along your crease.

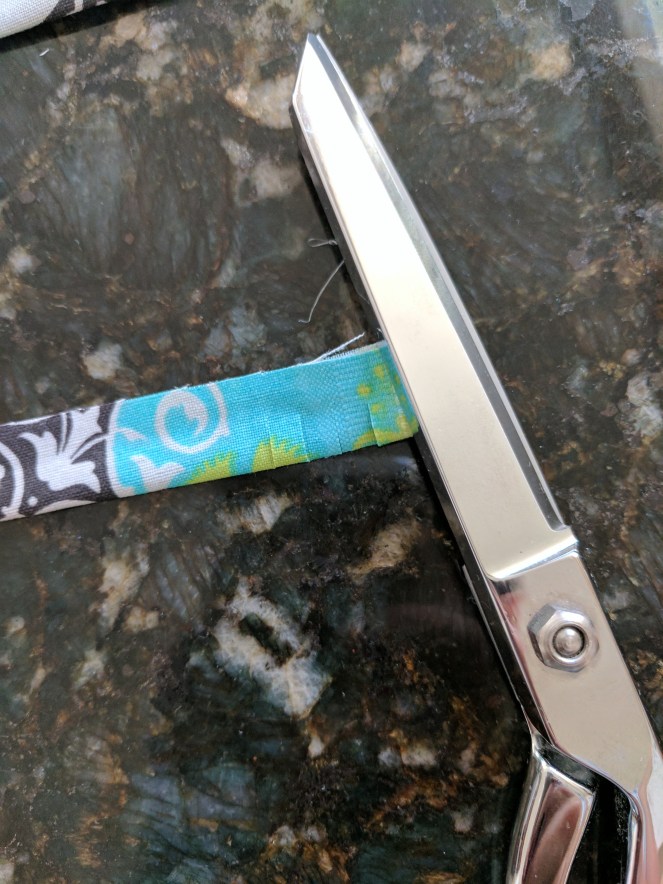
Once it’s glued together, take your scissors and make little cuts up to where the fabric is glued. Don’t cut all the way up!
Once the whole strip has cuts, begin gluing it around the felt circle, starting with the outside and working your way inward. You can make it as tight or as loose as you want – for my bigger flower I stayed closer together and had more layers. The little flower is quite a bit looser. If you use up your first strip and have more felt to cover, you just continue gluing with a new strip.


For the middle, you need a tiny strip of fabric that has been glued and cut (See previous steps). Roll it together and put a huge glob of hot glue in the middle of the circle to stick it to and hold it in place. Once you’re happy with the flower, you can fluff it a bit and then it’s ready to go. They can be put on packages, baby headbands, used to decorate picture frames… the sky is the limit!


