I actually created this quite a while ago, but I was waiting until after this past weekend to post since it was a gift! One of my friends has a daughter with the same name as mine and they are 3 weeks apart in age! We love getting them together for play dates, and more recently we have been doing party planning and crafts together. Her daughter’s birthday party was last weekend, and I wanted to make a memory board for her bedroom. I knew what the theme was ahead of time and was able to sneak back to Hobby Lobby to purchase one of her theme fabrics.
This memory board was very easy to create and did not require very many materials. You just need a canvas, fabric, some batting, ribbon, (buttons – optional), hot glue, and a saw tooth hanger for the back.

I measured out my fabric to be just a couple of inches longer on each side of the canvas. I also cut out batting to be roughly the same size as the canvas (so the fabric was the biggest). I ironed out the fabric and then placed the wrong side up (printed side down, touching the countertop). The batting got laid down next, with the canvas (wrong side up) centered on top of the batting.


Next, I started to wrap the fabric around the canvas, hot gluing a little at a time, while I worked my way around each side. You want to keep it tight as you go, and pretend like you are wrapping a present. I tucked the small excess of fabric under the frame, so that it looks clean on the back.


After the fabric was glued in place, I used a ruler to figure out placement of my ribbons. I used a little hot glue on the end of each ribbon to secure them. Then I used a dab of hot glue anywhere there was a ribbon overlap. (You don’t want to hot glue the entire ribbon down on the board or you won’t be able to slide photos underneath.) Anywhere there was overlap, I also placed a button.


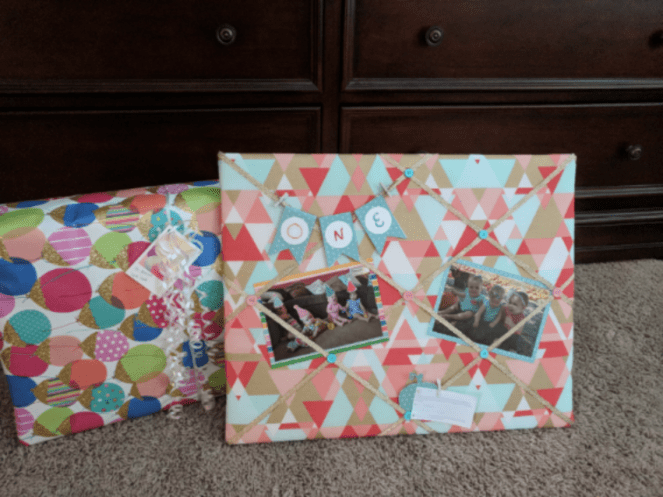
Once I was happy with my board, I nailed a sawtooth hanger onto the back, and then it was time to decorate! I placed a couple of photos and a mini banner on it and left the rest blank for party pictures to be added on later. I loved how easy this project was, and I even had a spare canvas to make one for my daughter!