
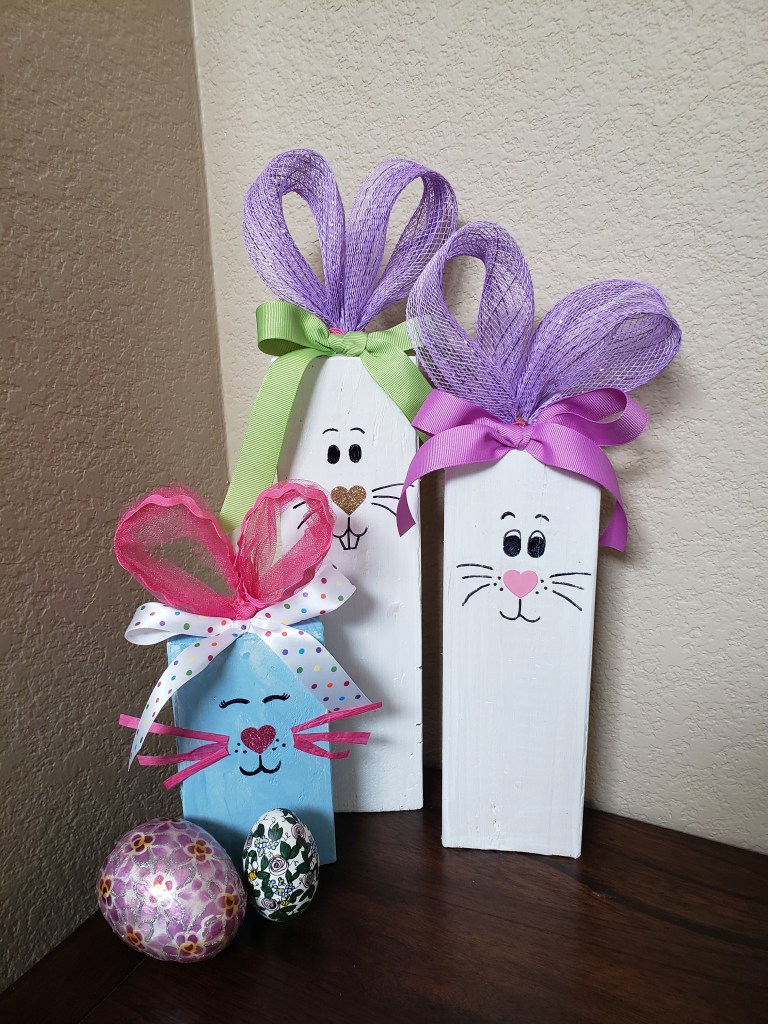
I was supposed to lead my MOPS group in a craft a couple of weeks ago, and I had decided on wood bunnies! However, with the quarantining, we were not able to meet. I still enjoyed making these for our home, and Lexi helped me with the painting! She decided the baby bunny needed to be blue, and I love how it turned out. It is probably my favorite, with its blue body and hot pink whiskers and nose. While I am posting this a bit late (as it is already Easter!), it could still be made as a spring decoration or kept in mind as a craft for next year. 😉
Supplies Needed:
2×4 of wood – cut into your desired length (I did 6”, 10”, and 12”)
Sandpaper
Paint and brush
Hot glue gun
Ribbon (tied in a bow, to cover where the ears are glued to the wood)
Sharpie
Embellishments: (These are just ideas! Get creative!)
[Ears: burlap, tulle, mesh
Heart Nose: sticker, confetti, chipboard
Whiskers: raffia, pipe cleaners, wire]
Directions:
Saw your 2×4 into the desired length of your bunny. (Remember, the ears will add some more height as well!) With sandpaper, smooth out all sides to prevent future splinters.
Paint the wood block and let dry thoroughly. I used white on all three of mine, even on the blue bunny. It provided a good primer and brought the color out.
Once dry, you’re ready for the ears and face! Form the ears and tie them into place. Then hot glue them to the wood. (For the mesh material, I used an old twist tie to keep them together and then hot glued them to the top of the wood. As for the tulle, I incorporated some rick rack to help them keep their form.)
Last, add the face! I dug out old valentines supplies for the noses and used some pink raffia for the blue bunny’s whiskers. For the rest of the faces, I just used a black sharpie to draw them on. Have fun!
